
Have you ever had a recipe looming in the distance? One you've wanted to make but you're just a weeeeeeee bit intimidated by it? No? Ok, I have issues...
We had a salsa contest at work for Cinco De Mayo. I love me some mexican food so I was all in. Here's the recipe I made. I took ideas from a couple recipes I found online and added my own little twists to it. Enjoy! Make it a day ahead so the flavors really jive together. It is WAY easier than it sounds. Don't let the multiple step deter you.
Shannon's Salsa:
8-12 Roma Tomatoes
1 medium white onion
2 Pasilla Peppers
1 Yellow Chile
1 Jalapeno Pepper
4 Cloves Garlic
1/4 C Cilantro
1/4 Apple Cider Vinegar
Juice of 2 limes
2 tsp Ground Cumin
3 tsp Dried Oregano
Ground pepper
salt
1) Preheat the oven to 450
2) Cut off the top of the tomato and slice in half length wise
3) Peel and cut onion into quarters
4) Peel garlic
5) Place tomatoes (cut side down) on a baking sheet (One that has a rim around the edge)
6) Please peppers, onion, garlic on the baking sheet with the tomatoes
7) Roast in oven about 30 minutes or until skins of peppers and tomatoes get some black spots and start to bubble a little.
8) Remove from oven and place another cookie sheet over the vegetables for about 10 minutes.
9) Remove skins from the peppers. Now is a good time to remove the seeds if you don't want hot salsa. The more seeds you have, the hotter it will be.
10) Place tomatoes (with skins) in a food processor and puree them to your desired consistency, pour into a bowl
11) Add Oregano, cumin, onions, cilantro, peppers, garlic to the food processor and puree to desired consistency. Add to the tomatoes and stir together.
12) Add lime juice and vinegar and stir until well combined
13) add salt and pepper to taste (about 1 tsp of each)
14) allow to chill over night.
It has a sweet side to it and a tiny little kick at the end. I don't like really hot salsa so this is perfect for me. I don't think anyone "won" the contest so I will just give myself 1st Place (just kidding... kind of). Enjoy!

Showing posts with label Recipes. Show all posts
Showing posts with label Recipes. Show all posts
Monday, May 6, 2013

Tuesday, December 4, 2012
The 50/50 Plan: Update
I have to say, I am kind of on a roll. I knew this weight loss journey wouldn't be easy but I have so much support, it almost seems easy. I have to do the work myself but it is great having others around me that are on a similar path.
This month I started a 6 week health challenge called "Elf For Health". Every 2 weeks we are paired with an "elf". During those two weeks we encourage each other, send recipes and work outs etc. My current elf is Amanda. She's just the sweetest! I love getting emails from her and hearing about her two littles! ( 6 weeks and 2 1/2 yrs). It always amazes me how moms have time to eat healthy and/or work out. I can barely find the time and I have no kids. hehe.
We also have daily challenges. So far we've had these challenges:
Day 1: Go meatleass monday
Day 2: Send a handwritten card or note to someone
Day 3: Try a new workout
Day 4: Get up 15 minutes earlier to meditate/reflect/pray
Day 5: How many different colors can you eat today
Day6/7: Clean out your closet1 Fill a bag and donate it
Day 8: Track your fiber intake. Shoot for 30g
Day 9: Have a salad today and make your own dressing
Today was the day we made our own salad dressing. I was pretty impressed with myself for making one. It was incredibly easy. Here's the recipe for you! I only made a small amount but it can be doubled or tripled even.
Apple Balsamic Dressing:
1 Tbsp Apple Butter
2 Tbsp Balsamic Vinegar
3 1/2 Tbsp Extra Virgin Olive Oil
fresh ground/cracked pepper to taste
Add all of the ingredients to a bowl or cup with a lid. Shake it up and serve!
I paired this with a salad that had: Mixed greens, pomegranate arils, shredded carrots, apple, walnuts and bleu cheese crumbles. It. Was. Delicious.
I don't know why I don't eat more salads like this. They are so incredibly tasty, good for your and very easy to make.
I don't know if I am 100 % on track to meet my 50lb goal in 50 weeks but I am getting SO close! I don't care if it takes me 55 weeks, I just want to get there. Running has been great lately. I ran my first 10K race on Thanksgiving day and did better than I had hoped. The Tinkerbell Half Marathon is in about 6 weeks. I feel mostly ready. I just need to get a few more long runs under my belt.
So here's where I am at right now:
Current weight: 158.8 lbs
Total loss: 37.2 lbs
Current size: 10
I cannot even explain how good I feel these days!
This month I started a 6 week health challenge called "Elf For Health". Every 2 weeks we are paired with an "elf". During those two weeks we encourage each other, send recipes and work outs etc. My current elf is Amanda. She's just the sweetest! I love getting emails from her and hearing about her two littles! ( 6 weeks and 2 1/2 yrs). It always amazes me how moms have time to eat healthy and/or work out. I can barely find the time and I have no kids. hehe.
We also have daily challenges. So far we've had these challenges:
Day 1: Go meatleass monday
Day 2: Send a handwritten card or note to someone
Day 3: Try a new workout
Day 4: Get up 15 minutes earlier to meditate/reflect/pray
Day 5: How many different colors can you eat today
Day6/7: Clean out your closet1 Fill a bag and donate it
Day 8: Track your fiber intake. Shoot for 30g
Day 9: Have a salad today and make your own dressing
Today was the day we made our own salad dressing. I was pretty impressed with myself for making one. It was incredibly easy. Here's the recipe for you! I only made a small amount but it can be doubled or tripled even.
Apple Balsamic Dressing:
1 Tbsp Apple Butter
2 Tbsp Balsamic Vinegar
3 1/2 Tbsp Extra Virgin Olive Oil
fresh ground/cracked pepper to taste
Add all of the ingredients to a bowl or cup with a lid. Shake it up and serve!
I paired this with a salad that had: Mixed greens, pomegranate arils, shredded carrots, apple, walnuts and bleu cheese crumbles. It. Was. Delicious.
I don't know why I don't eat more salads like this. They are so incredibly tasty, good for your and very easy to make.
I don't know if I am 100 % on track to meet my 50lb goal in 50 weeks but I am getting SO close! I don't care if it takes me 55 weeks, I just want to get there. Running has been great lately. I ran my first 10K race on Thanksgiving day and did better than I had hoped. The Tinkerbell Half Marathon is in about 6 weeks. I feel mostly ready. I just need to get a few more long runs under my belt.
So here's where I am at right now:
Current weight: 158.8 lbs
Total loss: 37.2 lbs
Current size: 10
I cannot even explain how good I feel these days!
Friday, March 30, 2012
The BEST Triple Chocolate Muffins!
I have an addiction... to chocolate. Triple Chocolate muffins are at the top of my "favorite foods" list. Stater Bros has some seriously amazing chocolate muffins. I don't want to even think about how many calories and grams of fat are in each of those!
I found a great recipe, compliments of Pinterest!
Here's the link to the Original Recipe: Triple Chocolate Chunk Muffins
I was skeptical at first because there was no flour etc. Let me tell you... these muffins did NOT dissapoint.
Here's the recipe with my (slight) modifications:
1 3/4 c oats
3 egg whites
3/4 cup unsweetened cocoa
1/2 cup unsweetened applesauce
1 tsp. vanilla extract
1/2 cup vanilla fat free Greek Yogurt
1/2 tsp cream of tartar (or 1-1/2 Tbsp. vinegar)
1-1/2 tsp. baking powder
1-1/2 tsp. baking soda
1/4 tsp. salt
1 cup hot water
1/2 C Sugar (original recipe calls for sugar substitute. I'm not a fan of those plus didn't have it on hand. I will probably reduce this to about 1/3 C next time)
•1/2 cup semi-sweet chocolate chips (or use white chocolate or peanut butter chips!)
Preheat oven to 350 degrees. Line 2 (12-cup) muffin pans with foil cupcake liners, or spray muffin tin with non-stick cooking spray. Set aside.
In a blender, (or food processor), mix all of the ingredients together, except for the chocolate chips. Blend until oats are ground and mixture is smooth. *Next time I think I will blend the dry ingredients more before adding wet ingredients*
Pour batter into each cupcake liner (mine filled about 20 liners).
Place muffins tins in the oven for 10 minutes. After 10 minutes, remove muffins from the oven (but don’t shut oven off), and distribute chocolate chips on top of each muffin.
Place the muffins back into the oven and bake for an additional 2-5 minutes, or until a toothpick comes out clean. *Note, you could skip this step by putting all of the chips in the batter, and baking the muffins for 12-15 min straight, but this method gives the muffins the traditional ‘VitaTop Muffin’ look with the chocolate chips on top!
Cool muffins before removing from pan. ENJOY!!!
Servings: 20-24 Smaller Muffins
58 Calories Per Muffin
The original recipe says to put half of the chocolate chips in the batter then bake for a bit then top with remaining chocolate chips and bake the final 5 minutes. I just chose to put them all on the top after the forst 10 minutes in the oven.
This is such a yummy, easy and healthy snack when you're on the go or for the kids!
I found a great recipe, compliments of Pinterest!
Here's the link to the Original Recipe: Triple Chocolate Chunk Muffins
I was skeptical at first because there was no flour etc. Let me tell you... these muffins did NOT dissapoint.
Here's the recipe with my (slight) modifications:
1 3/4 c oats
3 egg whites
3/4 cup unsweetened cocoa
1/2 cup unsweetened applesauce
1 tsp. vanilla extract
1/2 cup vanilla fat free Greek Yogurt
1/2 tsp cream of tartar (or 1-1/2 Tbsp. vinegar)
1-1/2 tsp. baking powder
1-1/2 tsp. baking soda
1/4 tsp. salt
1 cup hot water
1/2 C Sugar (original recipe calls for sugar substitute. I'm not a fan of those plus didn't have it on hand. I will probably reduce this to about 1/3 C next time)
•1/2 cup semi-sweet chocolate chips (or use white chocolate or peanut butter chips!)
Preheat oven to 350 degrees. Line 2 (12-cup) muffin pans with foil cupcake liners, or spray muffin tin with non-stick cooking spray. Set aside.
In a blender, (or food processor), mix all of the ingredients together, except for the chocolate chips. Blend until oats are ground and mixture is smooth. *Next time I think I will blend the dry ingredients more before adding wet ingredients*
Pour batter into each cupcake liner (mine filled about 20 liners).
Place muffins tins in the oven for 10 minutes. After 10 minutes, remove muffins from the oven (but don’t shut oven off), and distribute chocolate chips on top of each muffin.
Place the muffins back into the oven and bake for an additional 2-5 minutes, or until a toothpick comes out clean. *Note, you could skip this step by putting all of the chips in the batter, and baking the muffins for 12-15 min straight, but this method gives the muffins the traditional ‘VitaTop Muffin’ look with the chocolate chips on top!
Cool muffins before removing from pan. ENJOY!!!
Servings: 20-24 Smaller Muffins
58 Calories Per Muffin
The original recipe says to put half of the chocolate chips in the batter then bake for a bit then top with remaining chocolate chips and bake the final 5 minutes. I just chose to put them all on the top after the forst 10 minutes in the oven.
This is such a yummy, easy and healthy snack when you're on the go or for the kids!
Wednesday, March 28, 2012
Delicious Home Made Iced Coffee
For those coffee loving, Starbucks addicted, caffeine addicts... this recipe is for you (and me!) First of all, it is super easy. Second, it will save you money. Lastly, it is delicious!
I first saw the recipe on Pinterest. I will have to look for the link again. Oddly enough, this process was just on the Pioneer Woman's cooking show this past Saturday. Slightly different than how I did it but I am sure it is just as good.
Here's what you need for the coffee concentrate:
1 Pound Ground Coffee of your Choice (I used Starbucks Dark Espresso Roast)
1 gallon water
1 large Bowl
Coffee Filters or cheese cloth
1) Dump the pound of ground coffee into the large bowl.
 2) Pour the full gallon of water into the bowl with the coffee ground and give it a little stir just to make sure all of the coffee is saturated.
3) Cover and let sit 12-24 hours


I first saw the recipe on Pinterest. I will have to look for the link again. Oddly enough, this process was just on the Pioneer Woman's cooking show this past Saturday. Slightly different than how I did it but I am sure it is just as good.
Here's what you need for the coffee concentrate:
1 Pound Ground Coffee of your Choice (I used Starbucks Dark Espresso Roast)
1 gallon water
1 large Bowl
Coffee Filters or cheese cloth
1) Dump the pound of ground coffee into the large bowl.

3) Cover and let sit 12-24 hours

4) When the "brewing" time is up, grab a pitcher or something you can straing the coffee concentrate into.
5) Place the coffee filter or cheese cloth in a fine mesh strainer and slowly pour or laddle coffee into the the filters.

It sounds like a long process but it really isn't. The straining only took me about 20-30 minutes. It made approx 3/4 of a gallon. It will last a month in your refrigerator.

I tried out a couple "recipes" for the iced coffee.
First one:

6oz coffee concentrate
2 oz milk
2tbsp chocolate syrup
2tbsp sweetened condensed milk
ice
I blended this one in the blender. I need to tweak the ice vs liquid ratio to make it a little thicker but it tasted great
Secondly:

4oz coffee concentrate
3oz milk
2oz hazelnut coffee creamer
ice
I didn't blend this one, Just stirred it with a spoon.
I love this recipe because it gives you the opportunity to cut down on the calories by using fat free milk and fat free coffee creamer or sugar free coffee creamer. You can also save a lot of money. The average Grande sized Starbucks drink is about $4.35. I figured the cost of my supplies for the coffee concentrate, sweetended condensed milk, and coffee filters(I didn't even use the whole package. just a few of them) and it came out to about $16. This recipe made about 96 ounces of concentrate. You will use 4-6 ounces of concentrate per serving. That's 16 servings if using 6 ounces and 24 servings if you use 4 ounces. You're looking about about $1.00-$2.00 per serving once you include the added milk, coffee creamer, chocolate syrup or whatever else you use. Not bad!
It also saves you from using the gas money to get to starbucks, plus the time. And if you're feeling lazy... you have iced coffee right at your fingertips all summer!
Friday, December 23, 2011
Marshmallow Snowmen
These are such a fun addition to any holiday party. The original picture I saw used striped paper straws as the stick but I used lollipop sticks instead.
What you will need:
1 bag Large Marshmallows
1 Bag Twizzlers Pull n Peel
1/4 Cup Chocolate Chips
Round orange sprinkles
18-20 Long Lollipop Sticks
1 tooth pick


What you will need:
1 bag Large Marshmallows
1 Bag Twizzlers Pull n Peel
1/4 Cup Chocolate Chips
Round orange sprinkles
18-20 Long Lollipop Sticks
1 tooth pick
1) take 3 marshmallows and put them in a row on each lollipop stick

2) pull off 3 strings of twizzlers and wrap it around the marshmallows and lightly tie it in a knot

3) melt the chocolate in the microwave
4) dip the toothpick in the melted chocolate and poke it into the top marshmallow, creating eyes and a mouth
5) sip the tooth pick again and make "buttons" on the second marshmallow
6) use a small dab of chocolate to get the sprinkle to stick as the nose.

They really take no time at all. I used these to add the finishing touches to the Christmas gifts I made for Jared's co-workers. I made dozens of cookies and put them in cute boxes:


I got some cute (and inexpensive!) coffee mugs, coffee and hot chocolate and wrapped them all up. It was an easy, thoughtful and inexpensive way to say Merry Christmas to jared's co-workers.
Tuesday, November 15, 2011
A Special Gift
I have this friend. She's pretty darn amazing. I met her back in high school (maybe even Jr high?). We were choir nerds together. That's a bond that can stand the test of time.
Her name is Katie.
We are both grown ups now and live on opposite ends of the country. Thanks to a healthy addiction to social networking, we got back in touch. She is a runner but at one point in her life, she wasn't. She set out on a journey to lose some weight, which she did. She started running about 2 years ago and she has been unstoppable ever since.
On Sunday November 6, 2011 Katie finished the New York City Marathon. She ran and completed TWENTY-SIX miles!!! How many of us can say that? Not many! I tracked her run through out the day on the ING website. It was pretty fun to check up on her progress and cheer her on from Southern California. I "watched" closely at the end as she crossed the finish line. I even cheered a little.
I am extremely proud of Katie. Running a marathon is no easy feat and she inspires me to keep running. Katie has been a huge motivator and resource with my running. She's passed along a training plan for a half marathon, which I intend to follow in order to complete the Rock & Roll Half Marathon in June 2012. She asks me how my training is going, gives me pointers, reassures me when I feel like giving up or I can't do it. I am blessed to have Katie and a few others that run to help me along the way.
Because I am proud of Katie and think completing a marathon is a pretty big deal, I wanted to do something special for her.
I happily follow this blog and came across a recipe for "Marathon Cookies". Follow the link I attached and it will take you to the original recipe. I swapped out a few items ( I just couldn't find Chair seeds and the through ofbuying dates makes me gag...sorry Liz!). The recipe has 26 ingredients: 1 ingredient for every mile ran.

I watched Peyton and Tyler the other day so I had Peyton help me out with the cookies while Tyler was napping.
She's 3, almost for so she's a "big girl" now and can help pour stuff into the mixing bowl. I plopped her onto the step ladder and we started working.

As I chopped some of the items, she informed me that I could put them in the measuring cup and she would dump them into the bowl.
 She tried to scoop the flour and oatmeal, all by herself, out of the containers. It took about for scoops from each container to reach the amount we actually needed to add. She did great scooping the dough onto the cookie sheet.

I explained to her that these were special cookies for my friend Katie. "That's my mommy's name!", was her reply. I told her they were called Marathon Cookies and she repeated the name a few times. After the cookies were out of the oven I asked Peyton what kind of cookies we made. "Chocolate Chip". Oh the brain of a 3 year old!
Shortly after they munchkins went home, I packaged the cookies up and shipped them off to New York for the marathoner to enjoy.
 Congratulations Katie! I am SO proud of you!!
Here's my version of the Recipe:
1 cup butter, softened
2/3 cup creamy peanut butter
1 cup sugar
3/4 cup light brown sugar
1 1/2 tsp. vanilla
3 eggs
1 cup all-purpose flour
3/4 cup graham cracker crumbs
1 cup quick oats
1 tsp. cinnamon
1 1/2 tsp. baking soda
1 1/2 tsp. salt
1 tsp. nutmeg
1/4 cup semisweet chocolate chips
1/4 cup white chocolate chips
1/4 cup dark chocolate chips
1/4 cup peanut butter chips
1/4 cup chopped peanut butter cups
1/4 cup chopped pretzels
1/4 cup chopped banana chips
1/4 cup chopped apple chips
1/4 cup raisins
1/4 cup dried cranberries
1/4 cup dried blueberries
1/4 cup chopped walnuts
1/4 cup pumpkin seeds
Heat the oven to 350 degrees F.
Beat the butter, peanut butter, and sugars until creamy. Add the eggs, one at a time, and vanilla; mix until creamy.
In separate bowl, stir the flour, graham cracker crumbs, oats, cinnamon, baking soda, and salt. Gradually add the dry ingredients into the wet ingredients, mixing until combined. Fold the remaining ingredients into the cookie dough.
For large cookies, use a 2 1/2-inch cookie scoop to drop the dough onto an ungreased cookie sheet. Bake about 12 to 14 minutes, until deep golden brown.
Her name is Katie.
We are both grown ups now and live on opposite ends of the country. Thanks to a healthy addiction to social networking, we got back in touch. She is a runner but at one point in her life, she wasn't. She set out on a journey to lose some weight, which she did. She started running about 2 years ago and she has been unstoppable ever since.
On Sunday November 6, 2011 Katie finished the New York City Marathon. She ran and completed TWENTY-SIX miles!!! How many of us can say that? Not many! I tracked her run through out the day on the ING website. It was pretty fun to check up on her progress and cheer her on from Southern California. I "watched" closely at the end as she crossed the finish line. I even cheered a little.
I am extremely proud of Katie. Running a marathon is no easy feat and she inspires me to keep running. Katie has been a huge motivator and resource with my running. She's passed along a training plan for a half marathon, which I intend to follow in order to complete the Rock & Roll Half Marathon in June 2012. She asks me how my training is going, gives me pointers, reassures me when I feel like giving up or I can't do it. I am blessed to have Katie and a few others that run to help me along the way.
Because I am proud of Katie and think completing a marathon is a pretty big deal, I wanted to do something special for her.
I happily follow this blog and came across a recipe for "Marathon Cookies". Follow the link I attached and it will take you to the original recipe. I swapped out a few items ( I just couldn't find Chair seeds and the through ofbuying dates makes me gag...sorry Liz!). The recipe has 26 ingredients: 1 ingredient for every mile ran.

I watched Peyton and Tyler the other day so I had Peyton help me out with the cookies while Tyler was napping.
She's 3, almost for so she's a "big girl" now and can help pour stuff into the mixing bowl. I plopped her onto the step ladder and we started working.

As I chopped some of the items, she informed me that I could put them in the measuring cup and she would dump them into the bowl.
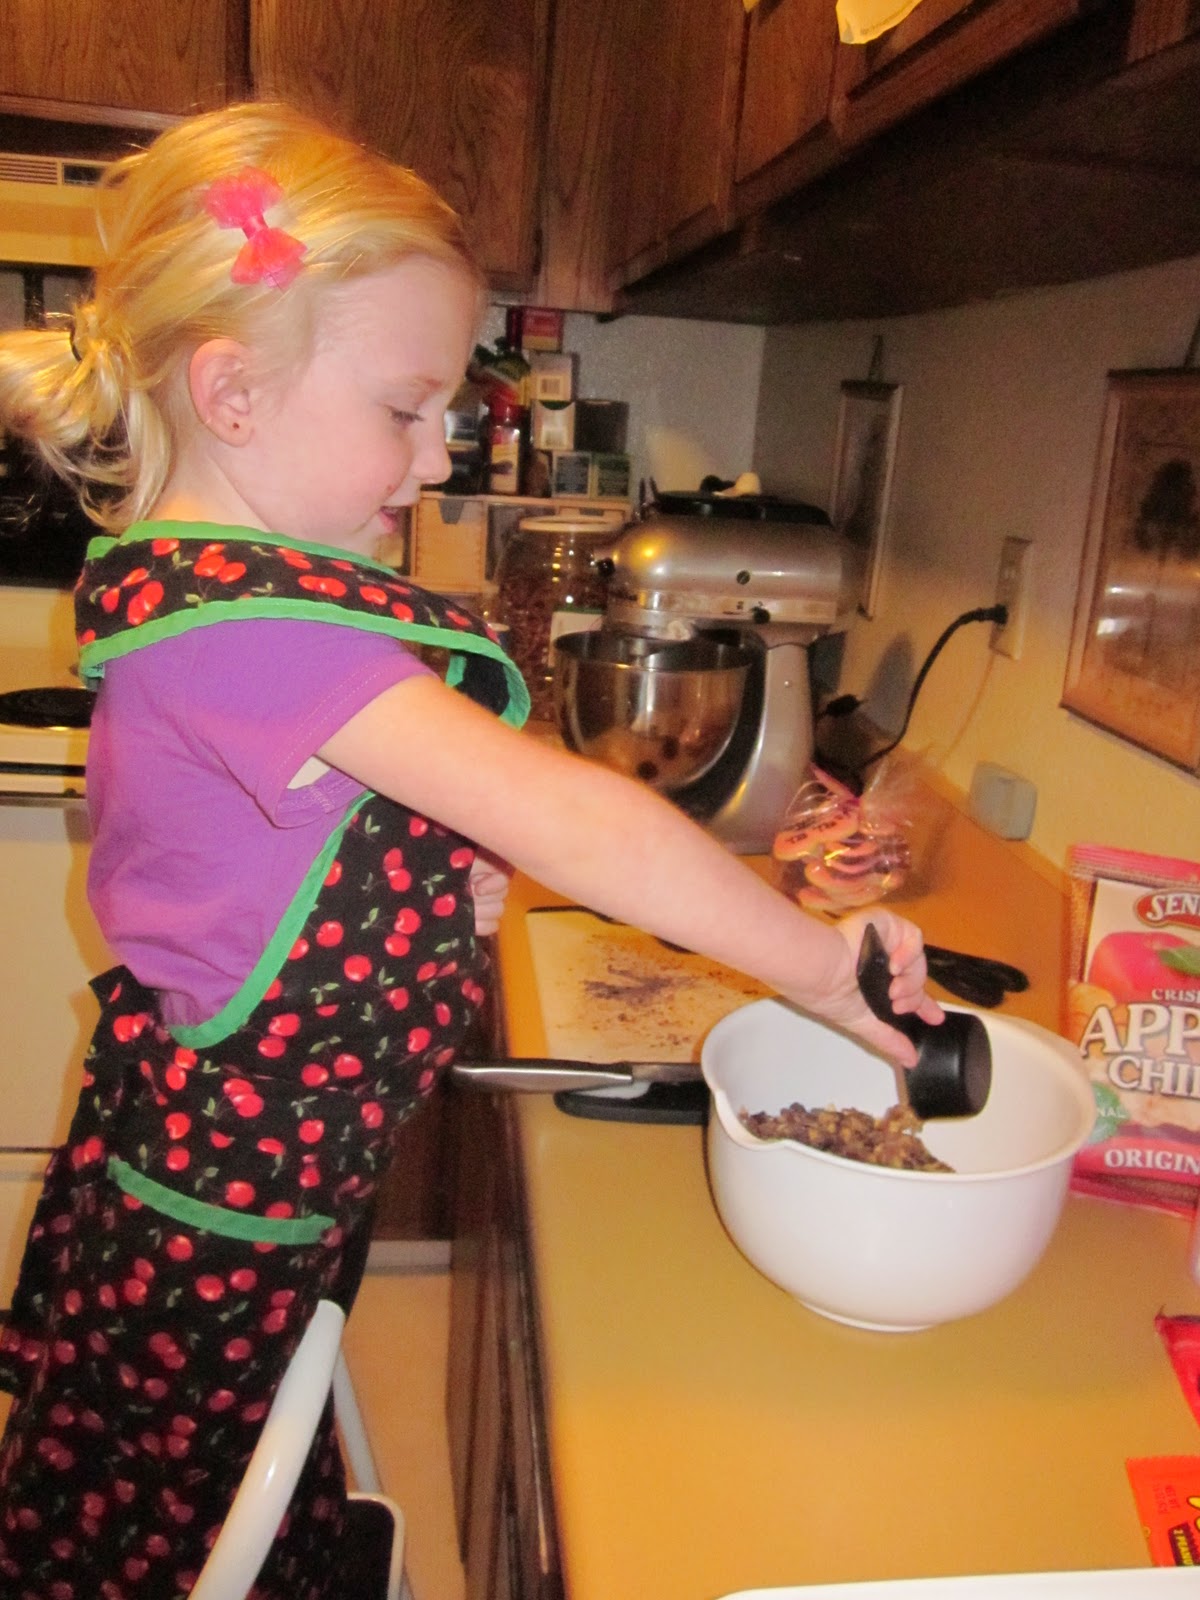

I explained to her that these were special cookies for my friend Katie. "That's my mommy's name!", was her reply. I told her they were called Marathon Cookies and she repeated the name a few times. After the cookies were out of the oven I asked Peyton what kind of cookies we made. "Chocolate Chip". Oh the brain of a 3 year old!
 |
| I couldn't let her make cookies and not let have one...What king of auntie would that make me? |
Shortly after they munchkins went home, I packaged the cookies up and shipped them off to New York for the marathoner to enjoy.

Here's my version of the Recipe:
1 cup butter, softened
2/3 cup creamy peanut butter
1 cup sugar
3/4 cup light brown sugar
1 1/2 tsp. vanilla
3 eggs
1 cup all-purpose flour
3/4 cup graham cracker crumbs
1 cup quick oats
1 tsp. cinnamon
1 1/2 tsp. baking soda
1 1/2 tsp. salt
1 tsp. nutmeg
1/4 cup semisweet chocolate chips
1/4 cup white chocolate chips
1/4 cup dark chocolate chips
1/4 cup peanut butter chips
1/4 cup chopped peanut butter cups
1/4 cup chopped pretzels
1/4 cup chopped banana chips
1/4 cup chopped apple chips
1/4 cup raisins
1/4 cup dried cranberries
1/4 cup dried blueberries
1/4 cup chopped walnuts
1/4 cup pumpkin seeds
Heat the oven to 350 degrees F.
Beat the butter, peanut butter, and sugars until creamy. Add the eggs, one at a time, and vanilla; mix until creamy.
In separate bowl, stir the flour, graham cracker crumbs, oats, cinnamon, baking soda, and salt. Gradually add the dry ingredients into the wet ingredients, mixing until combined. Fold the remaining ingredients into the cookie dough.
For large cookies, use a 2 1/2-inch cookie scoop to drop the dough onto an ungreased cookie sheet. Bake about 12 to 14 minutes, until deep golden brown.
Wednesday, October 19, 2011
Turkey Meatballs
Some people wrinkle their nose at the thought of using ground turkey instead of ground beef. If you cook it right, it is delicious! Have you tried my turkey burger recipe? Even my best friend's husband like them!
I am still trying to lose weight but more importantly I am simply trying to eat better. I have a weakness for all types of junk food and if I am not careful, I will end up on The Biggest Loser. I'd rather make changes now and avoid crying, screaming and sweating on national television!
Tonight I wanted spaghetti and meatballs. That's a rare thing for me but tonight it was my dinner of choice. Here's what I threw together: (amounts are approximate because I didn't measure as I went, sorry)
20oz Lean or Extra Lean Ground Turkey
1 1/2 C bread crumbs
2 Eggs (or you can use just egg whites)
2 cloves garlic, chopped
1/2 tsp Ground Pepper
1/2 tsp Garlic Powder
Salt - Just a dash or two
2 tbsp italian Seasoning (or a mixture of dry basil and oregano)
1) Preheat oven to 375
2) Line a baking pan with foil and lightly spray with non stick spray
3) In a medium size mixing bowl, mix eggs and ground turkey until well comined
4) Add the bread crumbs to the mixture until well combined
5) Add in all of the seasonings and mix well
6) Scoop up about 1/4c of the mixture and form it into a ball. Add more for larger meat balls or less for smaller
7) Place meatballs on baking sheet, evenly spaced apart
8) Bake 20-25 minutes or until no longer pink in the middle.
Next time I might add a little bit of onion, shredded zucchini and shredded carrots to bump up the nutrition value.
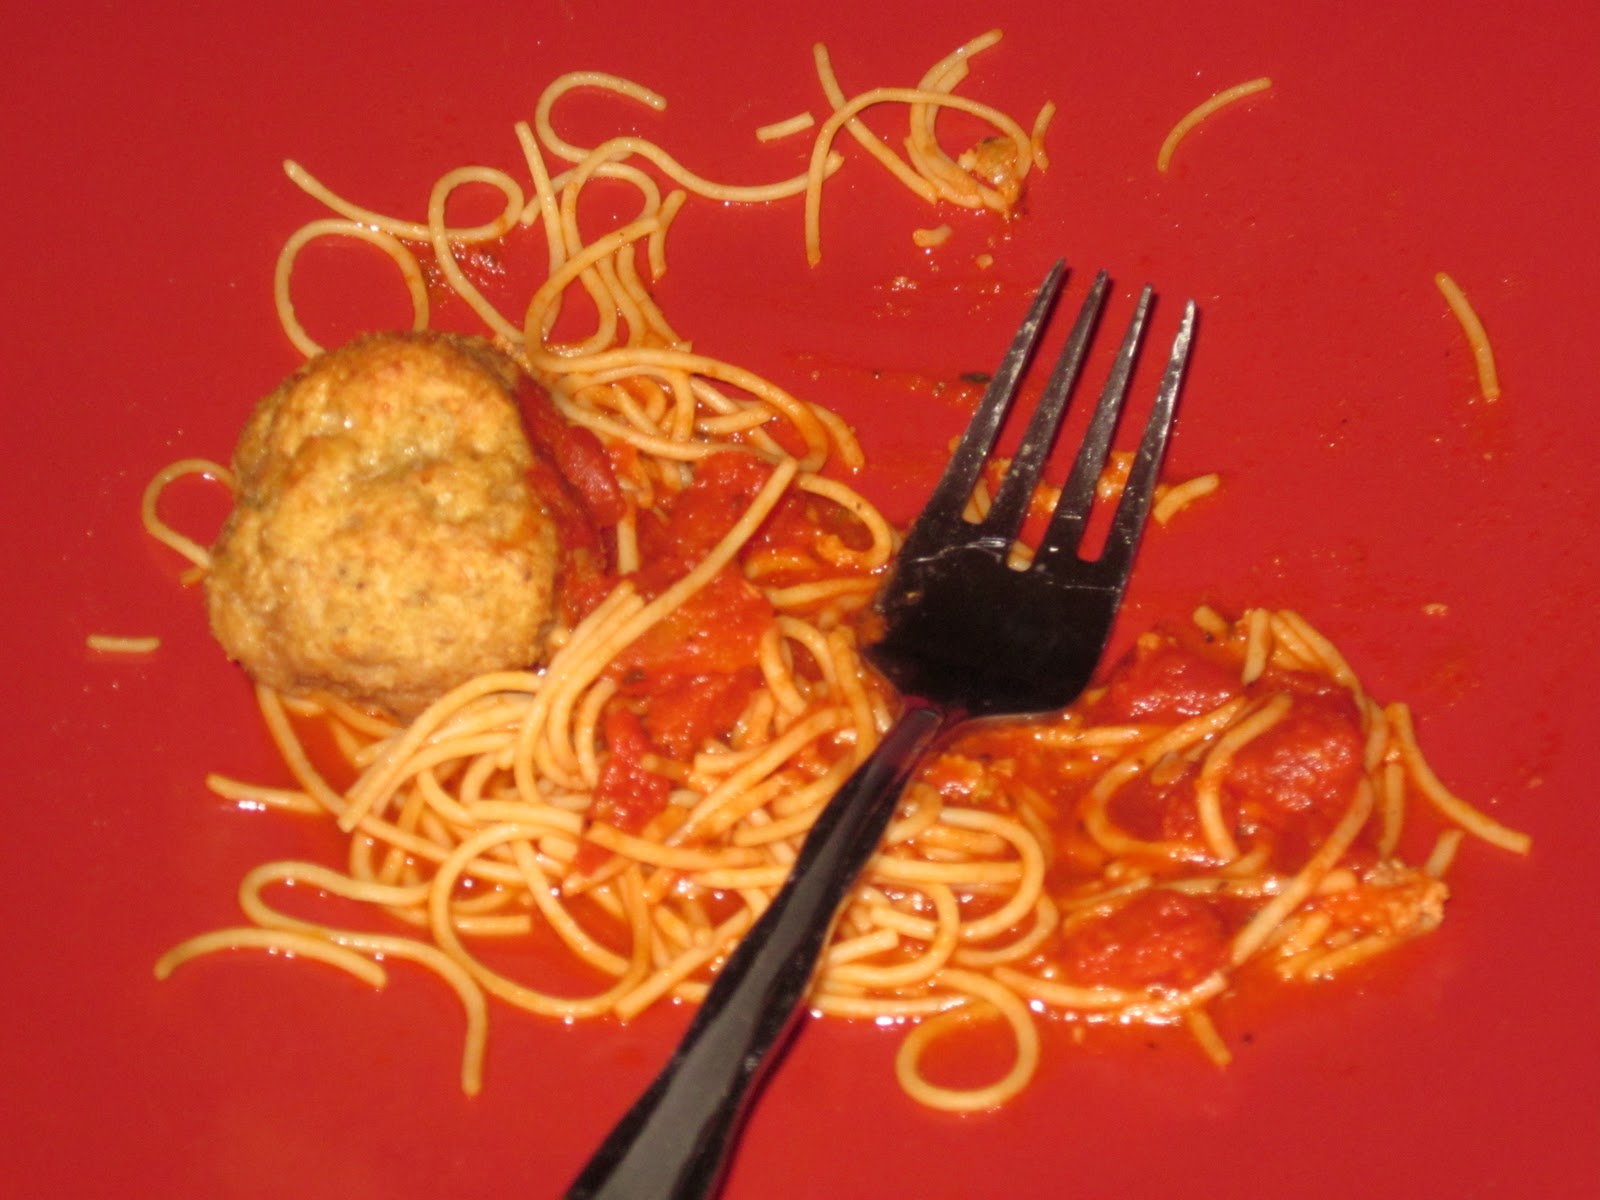
I ate mine with whole wheat pasta and tomato basil pasta sauce. Happy Tummy!
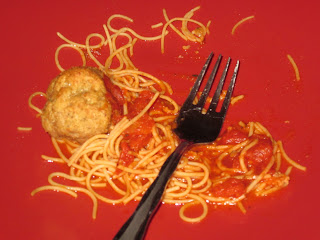
I am still trying to lose weight but more importantly I am simply trying to eat better. I have a weakness for all types of junk food and if I am not careful, I will end up on The Biggest Loser. I'd rather make changes now and avoid crying, screaming and sweating on national television!
Tonight I wanted spaghetti and meatballs. That's a rare thing for me but tonight it was my dinner of choice. Here's what I threw together: (amounts are approximate because I didn't measure as I went, sorry)
20oz Lean or Extra Lean Ground Turkey
1 1/2 C bread crumbs
2 Eggs (or you can use just egg whites)
2 cloves garlic, chopped
1/2 tsp Ground Pepper
1/2 tsp Garlic Powder
Salt - Just a dash or two
2 tbsp italian Seasoning (or a mixture of dry basil and oregano)
1) Preheat oven to 375
2) Line a baking pan with foil and lightly spray with non stick spray
3) In a medium size mixing bowl, mix eggs and ground turkey until well comined
4) Add the bread crumbs to the mixture until well combined
5) Add in all of the seasonings and mix well
6) Scoop up about 1/4c of the mixture and form it into a ball. Add more for larger meat balls or less for smaller
7) Place meatballs on baking sheet, evenly spaced apart
8) Bake 20-25 minutes or until no longer pink in the middle.
Next time I might add a little bit of onion, shredded zucchini and shredded carrots to bump up the nutrition value.
I ate mine with whole wheat pasta and tomato basil pasta sauce. Happy Tummy!
Sunday, July 31, 2011
Summertime Smoothie Series: Sunrise Smoothie
I found this particular smotthie quite refreshing.
![]() I used frozen fruit and it got to be a bit thick so I added a few tablespoons of water. For added nutrients and to get in a serving of vegetables, I added 1 C fresh Spinach and 1 heaping tablespoon of grated carrots. I also added 1 scoop of vanilla protein powder since this was my post workout treat. Enjoy!
I used frozen fruit and it got to be a bit thick so I added a few tablespoons of water. For added nutrients and to get in a serving of vegetables, I added 1 C fresh Spinach and 1 heaping tablespoon of grated carrots. I also added 1 scoop of vanilla protein powder since this was my post workout treat. Enjoy!
Sunrise Smoothie:
8oz Orange Juice
1 C Strawberries
1/2 C Raspberries
1/4 C Peaches1/2 C Pineapple
 I used frozen fruit and it got to be a bit thick so I added a few tablespoons of water. For added nutrients and to get in a serving of vegetables, I added 1 C fresh Spinach and 1 heaping tablespoon of grated carrots. I also added 1 scoop of vanilla protein powder since this was my post workout treat. Enjoy!
Sunday, July 24, 2011
Summertime Smoothie Series: Pumpkin Pie
I've noticed my recipes have been a bit ordinary so I thought I would experiment a little. This one may need some tweaking to suit your taste but I thought it turned out pretty good.
Who says Pumpkin Pie should only be around during the holidays? It is my favorite pie so why not give it a whirl?
![]() Pumpkin Pie Smoothie:
Pumpkin Pie Smoothie:
8 Tbsp Canned Pumpkin*
1 1/2 tsp Pumpkin Pie Spice**
2 Tsp Sugar
8oz Milk
Ice
* If you use "Canned Pumpkin Pie Filling" you can omit the Pumpkin Pie Spice
** If you don't have "Pumpkin Pie Spice" you can mix a combo of cinnamon, nutmeg, cloves, ginger, all spice for a similar taste.
This recipe isn't perfected yet but it is definitely a good start.
Who says Pumpkin Pie should only be around during the holidays? It is my favorite pie so why not give it a whirl?

8 Tbsp Canned Pumpkin*
1 1/2 tsp Pumpkin Pie Spice**
2 Tsp Sugar
8oz Milk
Ice
* If you use "Canned Pumpkin Pie Filling" you can omit the Pumpkin Pie Spice
** If you don't have "Pumpkin Pie Spice" you can mix a combo of cinnamon, nutmeg, cloves, ginger, all spice for a similar taste.
This recipe isn't perfected yet but it is definitely a good start.
Sunday, July 17, 2011
Summertime Smoothie Series: Chocolate, Peanut Butter, Banana
 |
| Oh YES! |
I kind of feel like this recipe is an oldie but a goodie. I've never had a Peanut Butter and Banana sandwich and I don't know if I ever will but the combination works within the smoothie realm.
If the three ingredients together make you cringe a little, adjust it to your liking. Do Chocolate /Peanut Butter or Chocolate /Banana or Peanut Butter/Banana.
Chocolate/Peanut Butter/Banana:
1 Tbsp Peanut Butter
1 Ripe Banana8oz Dark Chocolate Almond Milk (or us regular milk)
**or you can use chocolate syrup or chocolate protein powder to achieve the chocolate flavor**Ice


Sunday, July 10, 2011
Summertime Smoothie Series: Strawberry Banana
Sometimes keeping it simple is the best thing to do. This one is a tried and true recipe. Easy. Delicious.
![]()
8oz Fat Free Milk (or water)
Ice
Next time I may add 4 oz of yogurt or some protein powder to make it just a little thicker.

Strawberry Banana:
3/4C Strawberries1 Ripe Banana
1/2 tsp sugar (if the strawberries aren't quite ripe)8oz Fat Free Milk (or water)
Ice
Next time I may add 4 oz of yogurt or some protein powder to make it just a little thicker.
Sunday, July 3, 2011
Tuscan Garlic Chicken
I made this last week for Jared and I. He's not a fan of bell peppers (weirdo) but he just picked them out and went on about the business of eating. I cheated a little bit with the one I made so I will post my version for you.
Original Recipe can be found here.
Here's my re-vamped recipe:
3/4 cup all-purpose flour
1/2 tablespoon salt
1 teaspoon pepper
1/2 teaspoon dried basil
1/2 teaspoon dried oregano
4 boneless, skinless chicken breasts
5 tablespoons extra virgin olive oil, divided
1 tablespoon finely minced garlic (about 4-5 cloves)
1 red bell pepper, cut into thin strips or chopped
6 ounces fresh spinach
1 Jar pre-made Alfredo Sauce (I used Classico Foiur Cheese Alfredo)
3 TBsp Milk
1 pound fettuccine
Preheat the oven to 350 degrees F.
In a shallow pie plate or similar dish, combine the flour, salt, pepper, basil and oregano. Dip each chicken piece in the flour mixture until both sides are well coated.
In a large 12-inch nonstick skillet, heat 3 tablespoons of the olive oil over medium heat until the oil is hot and shimmering. Carefully place the chicken breasts in the pan, cooking them for 2-3 minutes on each side, until they are golden and browned but not cooked all the way through.
Place chicken on a foil-lined, lightly greased baking sheet and bake in the preheated oven for about 15 minutes, until the chicken is cooked through. I let it sit for about 5minutes then cute the chicken into pieces. It was easier to eat that way.
While the chicken is cooking, heat a large pot of water to a boil and add the noodles, cooking until al dente. Also, wipe out the skillet with a couple paper towels and return it to medium heat, adding the remaining 2 tablespoons olive oil. When the oil is hot, add the garlic and bell pepper, sauteing for 2-3 minutes.
Add Jar of Alfredo sauce to the garlic/peppers skillet and stir. Slowly add the milk. Add more milk if you want the sauce to be slightly thinner. Add the Spinach and let it simmer about 5 minutes, stirring often so it doesn't curdle.
Drain the past and return it to the pot. Drizzle with olive oil so it doesn't stick together
Top with breaded chicken the douse with sauce. Enjoy!
![]()
Original Recipe can be found here.
Here's my re-vamped recipe:
3/4 cup all-purpose flour
1/2 tablespoon salt
1 teaspoon pepper
1/2 teaspoon dried basil
1/2 teaspoon dried oregano
4 boneless, skinless chicken breasts
5 tablespoons extra virgin olive oil, divided
1 tablespoon finely minced garlic (about 4-5 cloves)
1 red bell pepper, cut into thin strips or chopped
6 ounces fresh spinach
1 Jar pre-made Alfredo Sauce (I used Classico Foiur Cheese Alfredo)
3 TBsp Milk
1 pound fettuccine
Preheat the oven to 350 degrees F.
In a shallow pie plate or similar dish, combine the flour, salt, pepper, basil and oregano. Dip each chicken piece in the flour mixture until both sides are well coated.
In a large 12-inch nonstick skillet, heat 3 tablespoons of the olive oil over medium heat until the oil is hot and shimmering. Carefully place the chicken breasts in the pan, cooking them for 2-3 minutes on each side, until they are golden and browned but not cooked all the way through.
Place chicken on a foil-lined, lightly greased baking sheet and bake in the preheated oven for about 15 minutes, until the chicken is cooked through. I let it sit for about 5minutes then cute the chicken into pieces. It was easier to eat that way.
While the chicken is cooking, heat a large pot of water to a boil and add the noodles, cooking until al dente. Also, wipe out the skillet with a couple paper towels and return it to medium heat, adding the remaining 2 tablespoons olive oil. When the oil is hot, add the garlic and bell pepper, sauteing for 2-3 minutes.
Add Jar of Alfredo sauce to the garlic/peppers skillet and stir. Slowly add the milk. Add more milk if you want the sauce to be slightly thinner. Add the Spinach and let it simmer about 5 minutes, stirring often so it doesn't curdle.
Drain the past and return it to the pot. Drizzle with olive oil so it doesn't stick together
Top with breaded chicken the douse with sauce. Enjoy!

Summertime Smoothie Series: Strawberry Lemonade
The word "Lemonade" exudes Summer. An even better version? Strawberry Lemonade.
My mouth is watering already.
1/2 Tsp lemon Zest
1 Tsp Lemon Juice
8 oz Lemon Yogurt (Fat Free)
3/4 C Strawberries
6 oz Water (or fat free milk)
Ice
Garnish with a whole strawberry and bendy straw and enjoy out on the front porch while watching the kiddles swim.
My mouth is watering already.
1/2 Tsp lemon Zest
1 Tsp Lemon Juice
8 oz Lemon Yogurt (Fat Free)
3/4 C Strawberries
6 oz Water (or fat free milk)
Ice
Garnish with a whole strawberry and bendy straw and enjoy out on the front porch while watching the kiddles swim.
Sunday, June 26, 2011
Summer Smoothie Series: Berry Bliss!
Antioxidants anyone? This smoothie full of them! And delicious to boot.
![]() Berry Bliss Smoothie:
Berry Bliss Smoothie:
1/3 C Blueberries
1/4 C Raspberries
1/3 C Blackberries
1/2 C Strawberries
1/3 C Cooked Oatmeal
1/4 C Fat Free Milk
1/4 C Water
Ice, If needed.
Blend until smoothie and enjoy! Add a scoop of Vanilla Protein Powder for an added boost of protein or a handful of fresh spinach to get in a serving of vegetable. You won't be able to taste the spinach. (psssstttt neither will the kids!).

1/3 C Blueberries
1/4 C Raspberries
1/3 C Blackberries
1/2 C Strawberries
1/3 C Cooked Oatmeal
1/4 C Fat Free Milk
1/4 C Water
Ice, If needed.
Blend until smoothie and enjoy! Add a scoop of Vanilla Protein Powder for an added boost of protein or a handful of fresh spinach to get in a serving of vegetable. You won't be able to taste the spinach. (psssstttt neither will the kids!).
Friday, June 24, 2011
Summer Smoothie Series: Breakfast Tropical Fruit Smoothie
To get this series kicked off, i thought I would go ahead and post a recipe today.
I think the following one of my favorite fruit combinations. Very summery and tropical. Calgon take me away...
1/2 C Frozen or Fresh Peaches
1/2 of a large Banana (or a full small one)
1/3 C Pineapple Chunks
1/3 C Fresh or Frozen Mango
4 oz Orange Juice
4oz Water (or fat free milk)
Ice (if you're not using frozen fruit)
Possible additions: 1 Scoop Vanilla Protein Powder, Peeled/Sliced Cucumber, Shredded Carrots, 1/2 C Yogurt
Toss all of the ingredients into the blender and blend for approx 35-45 seconds, longer if needed.
I think the following one of my favorite fruit combinations. Very summery and tropical. Calgon take me away...
1/2 C Frozen or Fresh Peaches
1/2 of a large Banana (or a full small one)
1/3 C Pineapple Chunks
1/3 C Fresh or Frozen Mango
4 oz Orange Juice
4oz Water (or fat free milk)
Ice (if you're not using frozen fruit)
Possible additions: 1 Scoop Vanilla Protein Powder, Peeled/Sliced Cucumber, Shredded Carrots, 1/2 C Yogurt
Toss all of the ingredients into the blender and blend for approx 35-45 seconds, longer if needed.
New! Summer Smoothie Series

With the heat climbing every so far, it has given me even less motivation to work out or cook or do... well, anything.
I have been trying to think of meals/snacks that are quick, easy,cool and budget friendly. What is more refreshing that a nice cold smoothie? So this summer I will be posting a new smoothie recipe every Sunday. They will be healthy smoothies, not full of ice cream or frozen yogurt and added sugars.
I took some time at the grocery store to compare fresh vs. frozen fruits. Of course, you want to buy fresh when you can but I think we all want to find the balance so you don't break the bank. At my local grocery store I compared the following prices:
Blueberries: 6oz fresh- $2.99, 16oz Frozen- $3.99
Raspberries: 6oz Fresh- $3.99, 12oz Frosen- $2.99
Blackberries: 12oz Freh- $5, 16oz Frozen- $2.99
Strawberries: 4lbs Fresh- $5, $16oz Frozen- $3.99
Mango: 1 Piece fruit- $1, 12oz Frozen- $2.99
Peaches: 8oz Can -$1.99, 16oz Frozen- $2.99
Pineapple: 8oz Can- $1.49, 12 oz Frozen-$2.99
One of these days I want to get out to our local Farmer's Market. Maybe I can find even better deals there. There are a lot of items I didn't list like apples, orange juice, vanilla protein powder, carrots etc because I already have those on hand.
Smoothies are great for the kiddles too! They are fruity, filling and cold. It also gets them those added servings of fruits and vegetables that can be a struggle for some parents. What kid wouldn't want a milkshake looking drink with a bendy straw when it is 100+ degrees outside? Plus, the combinations are virtually endless and each recipe usually makes a decent quantity. I am hoping to experiment a little by adding some vegetables, cooked oatmeal, protein powder and flaxseed meal etc to some of the smoothies for added nutrients. I am pretty stoked about this series. I hope you are too!!
Saturday, May 28, 2011
Strawberry Lemonade Scones

Scones:
2 1/2 Cups Flour
2 Tbsp Sugar
1 Tbsp Baking Powder
1/4 tsp Salt
1/2 Cup butter (chilled, not softened), cut into cubes
1 Cup diced Fresh Strawberries
1/2 Cup Freeze Dried Strawberries
1 Tbsp Lemon Zest
2 eggs, beaten
1/2 C Heavy Cream
Topping:
Lemon Curd
Sugar/Sanding Sugar
Cream
1) Preheat oven to 400 degrees. In a large bowl mix together flour, sugar, baking powder, and salt. With a pastry blender, cut in butter cubes until mix is coarse crumbs. Gently add both kinds of strawberries and the lemon zest. Make a well in the center of mixture and set bowl aside.
2) In a medium bowl mix eggs and cream. Add egg mixture to flour mixture. Gently stir until well mixed.
3) Place dough onto a well floured surface. Gently knead the dough by folding and fressing about 7 times, turning a quarter turn after each fold. Move dough onto a lightly floured parchment paper lined baking sheet. Pat dough into a 3/4in thick circle. Cut circle into wedges and separate slightly.
4) Brush each scone with cream and sprinkle with sugar. Bake 16-20 minutes.
5) Drizzle with lemon curd and sprinkle with sugar again or coarse sanding sugar. Makes 8-12 scones.
Tuesday, May 3, 2011
Stuffed Chocolate Chip Cookies
I made this and I fell in love. Hope you do too!

2 Stick Butter, softened
1 C white Sugar
3/4 C Brown Sugar
2 Large Eggs
1 Tbsp Vanilla Extract
3 1/2 C Flour
1 Tsp Baking Soda
1/2 Tsp Salt
3/4 C Chocolate Chips
1 Bag Reeses PB Cup Miniatues, the "big bag"
1) Preheat Oven to 350
2) Cream together Butter and Sugars until well combined
3) Add eggs one at a time, beating well after each additon
4) Add Vanilla
5) In a separate bowl blend together flour, salt, baking soda
6) Slowly add the dry ingredients to the wet ingredients and mix until fully combined
7) Gently mix in the chocolate chips
8) Using a cookie scoop or large table spoon, take one scoop of dough, split it in half then place the peanut butter cup on one half of the dough. Place the other half of the dough on the top and form dough around the peanut butter cup. Place the ball of dough on the the cookie sheet.
9) repeat until you run out of dough or PB cups.
10) Bake 9-13 minutes. Let cool a full 5 minutes on the cookie sheet before transferring to a cooling rack.
** I have also used Rolos (2 candies per cookie) and I plan on trying with snickers minis as well**
Tuesday, April 12, 2011
Blogging Madness
Over the last year or so I have started following more and more blogs. Most of them have something to do with baking or cooking. These women are all amazing and I wonder, how in the world, they have time to raise a family, bake some incredible desserts and blog just about every day. How??
My blogging is sporadic, at best. There's nothing consistent about it. In fact, I do a lot of blogging while I am at work. It is currently 1:21am and I am sitting in the dark at my work station typing away. My days off are so full of stuff... although it is hard to ramble off a list of things I did when someone asks. My brain is mush these days. Maybe it has something to do with the fact I work an average of 200+ hours a month? Noooo. It couldn't be. **whoops... tangent, back to the topic at hand**
Every.Single.Blog. I follow is inspiring to me in some way. I have flound some pretty amazing recipes and ideas on these blogs. I thought I would share some of them with you. I don't know any of these women personally but they feel like friends. They share their joys, frustrations and lots of laughs. I hope some of them can inspire you like they did me.
Tidy Mom
Bake at 350
Sweet Sugar Belle
I am Baker
I am Mommy
Food For my Family
Bluebonnets and Brownies
Little Bitty Bakes
Eat Live Run
Bakerella
My blogging is sporadic, at best. There's nothing consistent about it. In fact, I do a lot of blogging while I am at work. It is currently 1:21am and I am sitting in the dark at my work station typing away. My days off are so full of stuff... although it is hard to ramble off a list of things I did when someone asks. My brain is mush these days. Maybe it has something to do with the fact I work an average of 200+ hours a month? Noooo. It couldn't be. **whoops... tangent, back to the topic at hand**
Every.Single.Blog. I follow is inspiring to me in some way. I have flound some pretty amazing recipes and ideas on these blogs. I thought I would share some of them with you. I don't know any of these women personally but they feel like friends. They share their joys, frustrations and lots of laughs. I hope some of them can inspire you like they did me.
Tidy Mom
Bake at 350
Sweet Sugar Belle
I am Baker
I am Mommy
Food For my Family
Bluebonnets and Brownies
Little Bitty Bakes
Eat Live Run
Bakerella
Friday, March 18, 2011
Tips and Tricks
With as many cake/baking questions I get, you would think I am a professional. I guess I might know more than the average bear when it comes to baking but I am certainly no expert. Basically it is all trial and error along with many many google searches. I've also talked with a lot of people that bake and I follow a ridiculous amount of baking blogs.
Here are a couple of things I've learned along the way...
Brownies/Bars:
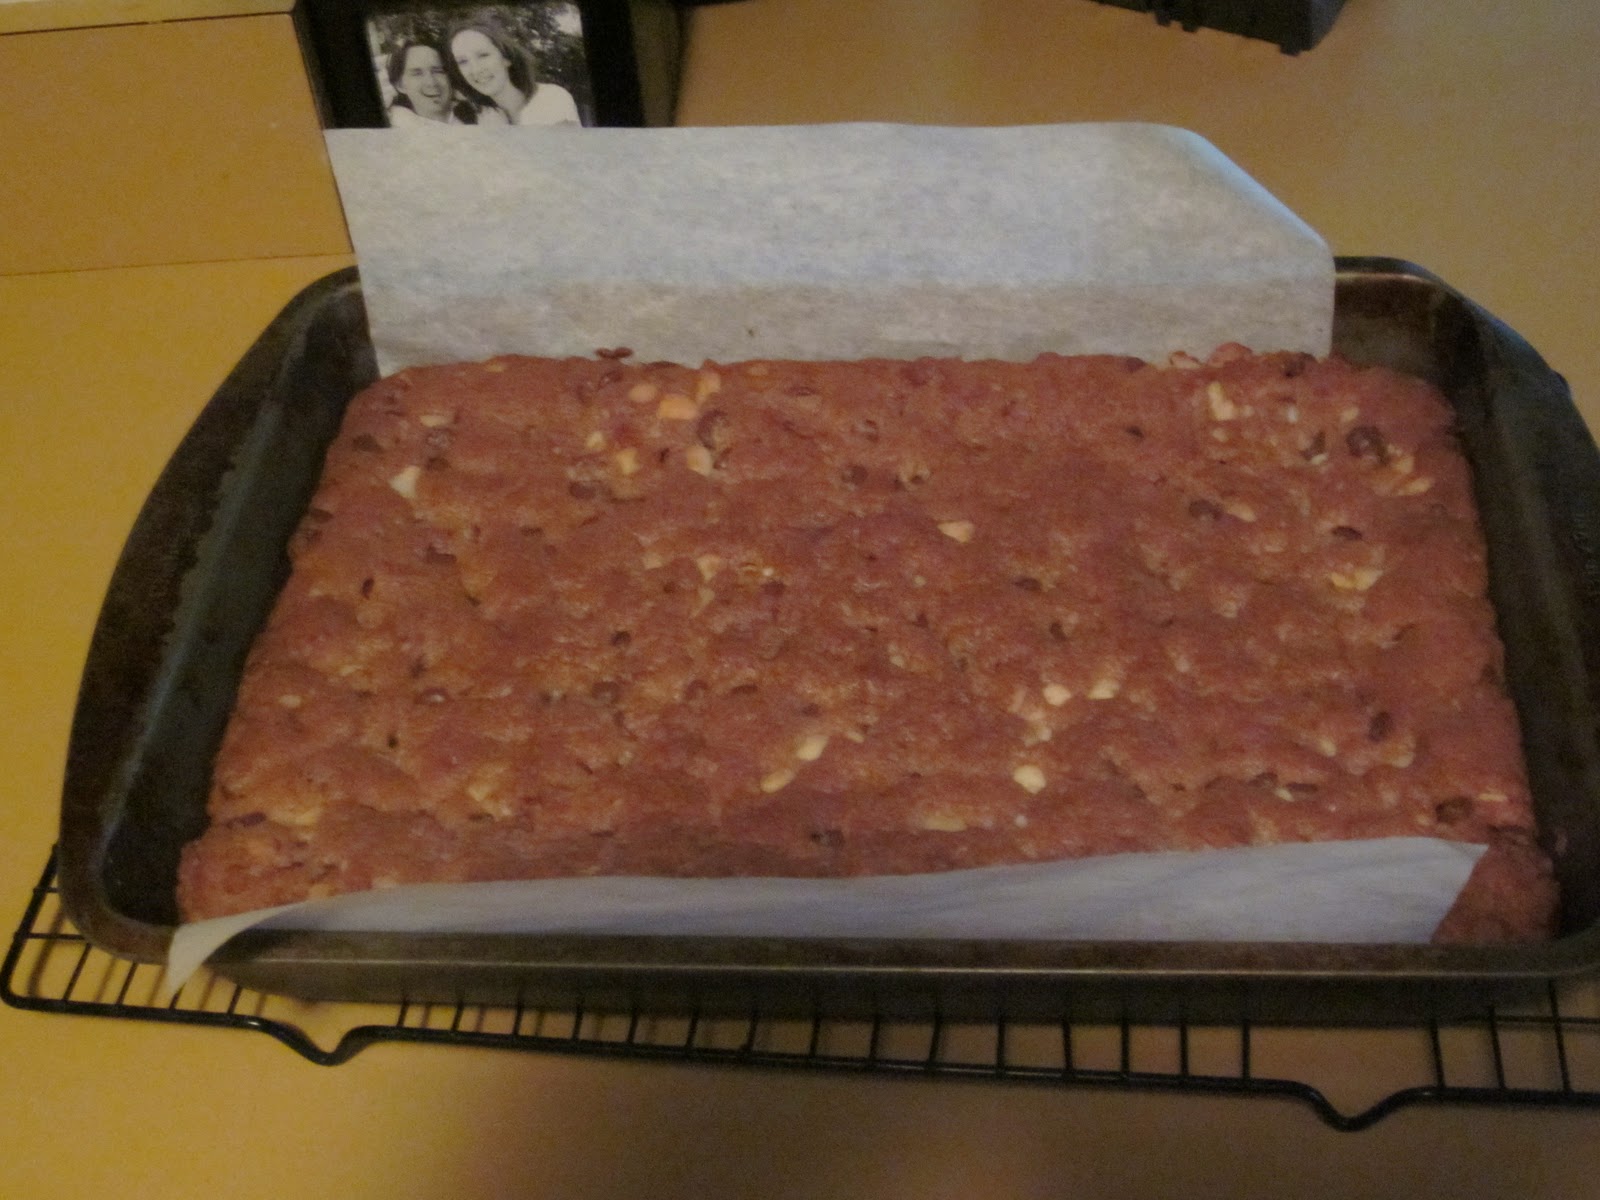
Ever had a tough time getting brownies and bar type desserts out of the pan? Here's a tip: Parchment paper.
1) Take a piece of parchment paper and cut it to about 4 inches wider than the 13x9in pan.
2) Trim the edges on the 9in sides so it fits right into the pan, leaving the extra hanging over on the 13in side.
3) Lightly spray with cooking spray and pour in the batter. bake as directed.
4) Allow the dish to cool completely. Run a spatula or butter knife along the 9in sides and corners.
5) Grip the parchment paper on the 13in sides and gently lift the whole thing out of the pan, placing it onto a cutting board.
6) Cut into bars.
(I'm not very good at explaining this so here's a picture to help)

Cakes:
To keep it from sticking:
1) Take a piece of parchment paper and lay it out on the counter
2) Place your cake pan (any shape!) face up on the parchment paper.
3) Trace the bottom of the pan using a pen or pencil
4) Cut out the shape
5) Lightly spray the inside of the cake pan
6) Place parchment paper shape into the bottom of the pan (it should lay flat) and lightly spray with cooking spray
7) Pour batter into pan. Bake and cool as directed.
Make it more dense:
Ever have a problem with the cake crumbling when you don't want it to?
1) Add the following to the mix:
1 Cup Flour
1 Cup Sugar
1 Cup Sour Cream
This will also add to the volume of batter so you will have a little more than normal. Bake it as directed.
Crumbs Crumbs Crumbs! Too many Crumbs!
Before slapping on the frosting and hoping for a perfectly iced cake, slap a "crumb coat" on.
1) Take a small amount of frosting and frost the cake with a very thin layer.
2) Refrigerate for about 20 minutes (should be slightly crusty/hard)
3) Frost as you normally would
This is especially helpful when you have a chocolate or dark colored cake and using light colored frosting.
Perfect Frosting recipe:
I know the stuff in the can is quick and easy but lets face it, it melts (quickly!) when it is hot outside, it doesn't harden up and it is super duper sweet! This here is a perfect frosting recipe. I don't use any others.
2 lbs confectioners sugar
1 1/2 cups Crisco
1/2 Cup Water
1/2 teaspoon salt
2 teaspoons extract of choice (lemon, orange, almond, rum, etc.)
1 teaspoon butter flavoring (optional)
Beat Crisco at high speed for 3 minutes. On low speed, add water (or other liquid), and salt. Slowly add sugar and flavorings. Beat on high for 5 minutes or until light and fluffy. Adjust flavorings and liquid if necessary. The end result should be a smooth and light frosting that is easy to spread.
This recipe may be cut in half or doubled.
Smooth Finish:
1) Use the above frosting recipe.
2) Frost the cake as you normally would, smoothing out the best you can
3) Let the cake sit on the counter for approx 30min. It should feel crusty/slightly hardened to the touch.
4) Cut a piece of parchment paper (about 6in) and lightly place the paper against the cake. Using small circular motions, rub your hand lightly against the paper.
5) Flip the paper over or cut a new piece if it starts to stick
Cookies:
Butter vs Margarine
1) There is no substitute for real butter.
2) You're making a cookie or a cake or some type of dessert, just use real butter. You won't regret it!
3) yes, it does taste different
Flat Cookies:
1) Your butter/crisco is too soft.
2) DO NOT microwave the butter! Set it out for an hour or two before you need to use it.
3) You should be able (easily) to leave a finger print in the butter without the whole stick squishing
Hard Cookies:
1) You used too much flour
2) Add about 2 TBSP of milk, that should help
Melting Chocolate:
The microwave method has never worked for me. My go-to method is the double boiler
1) Fill a medium sauce pan with water and place it over med-low heat
2) Find a glass or stainless steel bowl that can sit on top of the pan but does not fall inside
3) Place the chocolate chips in the glass/steel bowl
4) Stir constantly with a spoon or spatula.
5) Hold the bowl with a pot holder (lots of steam will start coming out)
6) Don't let any water get in the bowl with the chocolate
Hope this helps someone out there.
Here are a couple of things I've learned along the way...
Brownies/Bars:
Ever had a tough time getting brownies and bar type desserts out of the pan? Here's a tip: Parchment paper.
1) Take a piece of parchment paper and cut it to about 4 inches wider than the 13x9in pan.
2) Trim the edges on the 9in sides so it fits right into the pan, leaving the extra hanging over on the 13in side.
3) Lightly spray with cooking spray and pour in the batter. bake as directed.
4) Allow the dish to cool completely. Run a spatula or butter knife along the 9in sides and corners.
5) Grip the parchment paper on the 13in sides and gently lift the whole thing out of the pan, placing it onto a cutting board.
6) Cut into bars.
(I'm not very good at explaining this so here's a picture to help)
Cakes:
To keep it from sticking:
1) Take a piece of parchment paper and lay it out on the counter
2) Place your cake pan (any shape!) face up on the parchment paper.
3) Trace the bottom of the pan using a pen or pencil
4) Cut out the shape
5) Lightly spray the inside of the cake pan
6) Place parchment paper shape into the bottom of the pan (it should lay flat) and lightly spray with cooking spray
7) Pour batter into pan. Bake and cool as directed.
Make it more dense:
Ever have a problem with the cake crumbling when you don't want it to?
1) Add the following to the mix:
1 Cup Flour
1 Cup Sugar
1 Cup Sour Cream
This will also add to the volume of batter so you will have a little more than normal. Bake it as directed.
Crumbs Crumbs Crumbs! Too many Crumbs!
Before slapping on the frosting and hoping for a perfectly iced cake, slap a "crumb coat" on.
1) Take a small amount of frosting and frost the cake with a very thin layer.
2) Refrigerate for about 20 minutes (should be slightly crusty/hard)
3) Frost as you normally would
This is especially helpful when you have a chocolate or dark colored cake and using light colored frosting.
Perfect Frosting recipe:
I know the stuff in the can is quick and easy but lets face it, it melts (quickly!) when it is hot outside, it doesn't harden up and it is super duper sweet! This here is a perfect frosting recipe. I don't use any others.
2 lbs confectioners sugar
1 1/2 cups Crisco
1/2 Cup Water
1/2 teaspoon salt
2 teaspoons extract of choice (lemon, orange, almond, rum, etc.)
1 teaspoon butter flavoring (optional)
Beat Crisco at high speed for 3 minutes. On low speed, add water (or other liquid), and salt. Slowly add sugar and flavorings. Beat on high for 5 minutes or until light and fluffy. Adjust flavorings and liquid if necessary. The end result should be a smooth and light frosting that is easy to spread.
This recipe may be cut in half or doubled.
Smooth Finish:
1) Use the above frosting recipe.
2) Frost the cake as you normally would, smoothing out the best you can
3) Let the cake sit on the counter for approx 30min. It should feel crusty/slightly hardened to the touch.
4) Cut a piece of parchment paper (about 6in) and lightly place the paper against the cake. Using small circular motions, rub your hand lightly against the paper.
5) Flip the paper over or cut a new piece if it starts to stick
Cookies:
Butter vs Margarine
1) There is no substitute for real butter.
2) You're making a cookie or a cake or some type of dessert, just use real butter. You won't regret it!
3) yes, it does taste different
Flat Cookies:
1) Your butter/crisco is too soft.
2) DO NOT microwave the butter! Set it out for an hour or two before you need to use it.
3) You should be able (easily) to leave a finger print in the butter without the whole stick squishing
Hard Cookies:
1) You used too much flour
2) Add about 2 TBSP of milk, that should help
Melting Chocolate:
The microwave method has never worked for me. My go-to method is the double boiler
1) Fill a medium sauce pan with water and place it over med-low heat
2) Find a glass or stainless steel bowl that can sit on top of the pan but does not fall inside
3) Place the chocolate chips in the glass/steel bowl
4) Stir constantly with a spoon or spatula.
5) Hold the bowl with a pot holder (lots of steam will start coming out)
6) Don't let any water get in the bowl with the chocolate
Hope this helps someone out there.
Subscribe to:
Posts (Atom)